A kayak with bumpers will last longer and retain more value even after months of use. Without bumpers, the plastic hull of your kayak may be irreparably damaged by occasional contact with hard surfaces.
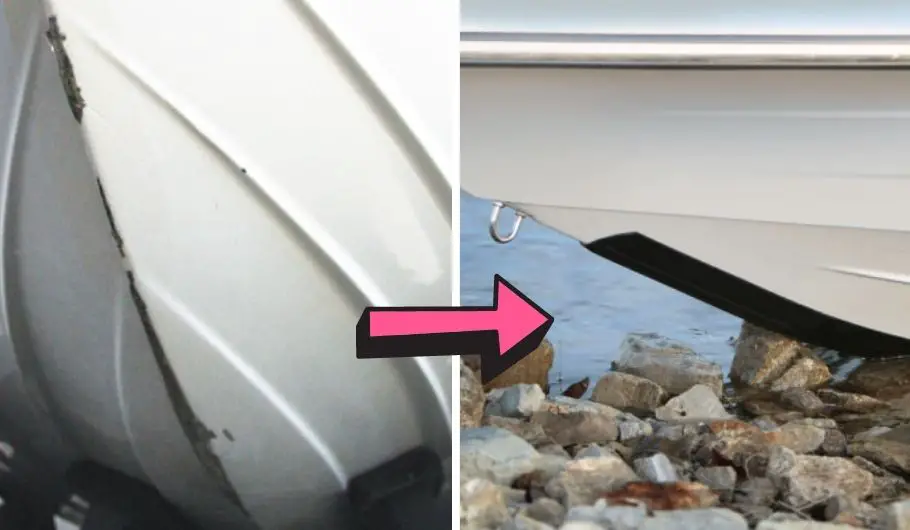
If you’re launching or landing your kayak at boat ramps, rocky beaches, oyster beds, or other abrasive surfaces, you risk scratches and dents to the kayak body.
A kayak bumper, kayak fender, or keel guard will protect your kayak from mechanical damage due to impact.
Learn more about equipping your kayak with bumpers, fenders, or other protective devices to keep it as good as new.
Table of Contents
What Are Kayak Bumpers/Fenders?
In kayak lingo, a fender is what you place under the kayak to pull it over land or out of the water without critical ground contact.
If necessary, you can use beach debris (e.g., sticks or seaweed) to put under the boat or in front of it before you pull it ashore or launch it (e.g., from a steep rocky ramp).
For 1-person kayaks, a quick solution could be a fender about 40 cm long and 10 cm thick, sold in specialized sail stores.
However, there are many professional solutions out there nowadays that can help you equip your kayak with bumpers and protect it long-term.
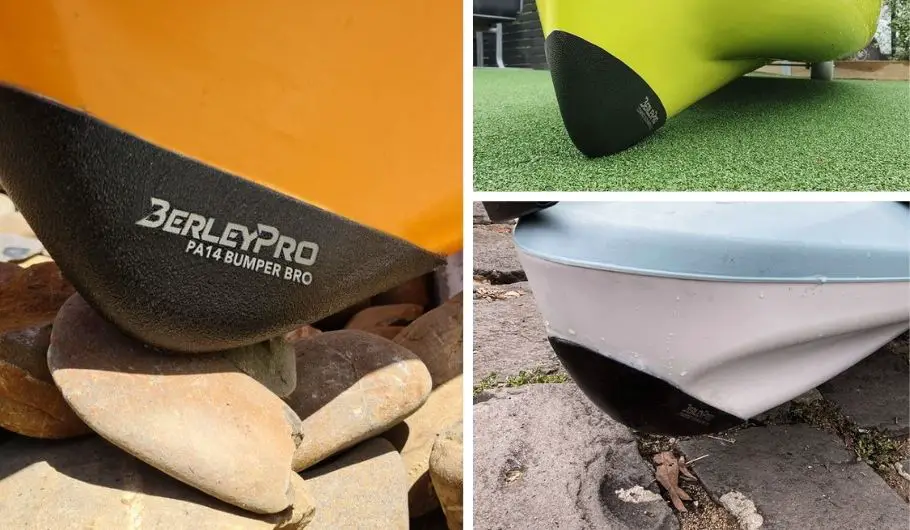
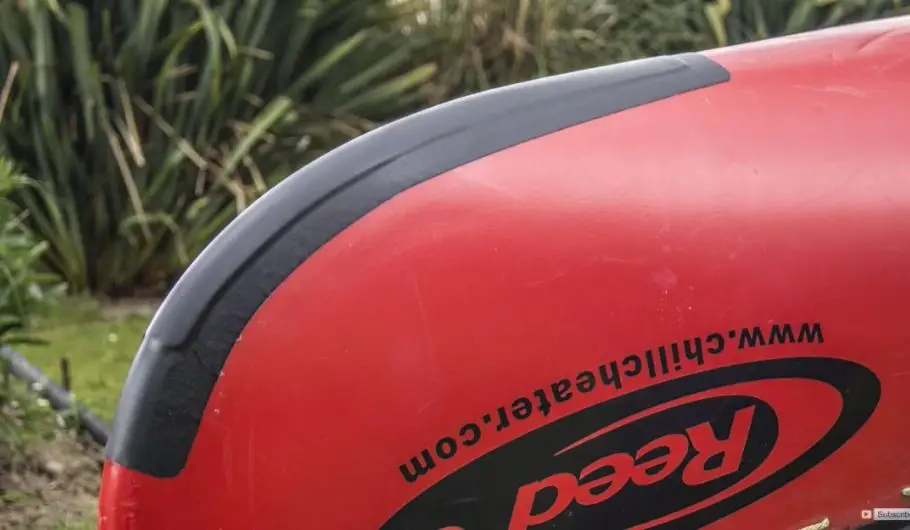
A kayak bumper goes to the front of your kayak to protect the nose from scrapes or scratches when launching, docking, or kayaking in rocky waters.
Kayak bumpers are commonly from hardened plastic, rubber, or resin in individual shapes to precisely match a kayak type.
You glue it onto the bow with a non-abrasive and water-resistant adhesive, ensuring no sand or debris can seep around the edges.
Other options are to protect the nose and a longer section of the keel or even the entire length of the hull from below. In this case, more flexible materials are used.
Why Are Kayak Bumpers Useful?
When something is damaged on a kayak, it’s usually that part of the underwater hull that is the first and last to bottom out. It’s not always possible to get in or out of a kayak without touching the ground.
Here’s why:
- the nature of the coast does not allow it (too deep, too rocky, too slippery)
- the water conditions make it impossible (e.g. surf or current)
- you lack the necessary help (for loaded kayaks).
Then there is nothing left but to slide into the water from the bank or shore (so-called seal launch) or to land in such a way that the kayak comes to a stop on land.
During these unavoidable landings, the keel of a kayak becomes heavily worn. In particular, this affects the bow and stern sections of the keel. At some point, first, the gel coat is rubbed off, then the paint, and finally, one mat layer after the other.
But not if you equip the kayak with bumpers first! That’s why they are super useful!
What Material Is Best Used to Protect Your Kayaks Hull?
There are a handful of materials that serve to protect your kayak hull. They all share specific characteristics, such as durability in contact with water, abrasion resistance, shock absorption, and reducing friction in the water.
Thermoformed ABS Plastic
ABS is a low-cost plastic material with outstanding impact resistance, resilience, and thermoforming characteristics. ABS plastic can assume the desired shape through heat exposure and offer the rugged durability of plastic with an even lighter weight.
Since some kayaks are made entirely of thermoformed ABS plastic, a kayak bumper seems to be a high-quality solution. However, such bumpers are not easy to come by, and you need to find one suited explicitly for your kayak hull shape.
Polymer Composites
Flexible adhesive tapes from these materials are often reinforced with a layer of acrylic foam for the right balance of strength and bonding. 3M® premium adhesive technology ensures that they won’t fall off even after prolonged water exposure.
Kevlar
Patented type of aramid felt fleece used in combination with laminating epoxy resin. Kevlar’s strength-to-weight ratio is five times that of steel. It’s a heat-resistant and robust synthetic fiber with various applications, including marine.
A skid plate is a strip of aramid/Kevlar, polymer strip, or thin aluminum applied to the bow and stern to reinforce the areas of the hull most susceptible to shock and abrasion.
Aluminum
Some people glue an aluminum rail under their kayak to prevent abrasion in the keel area, either entirely from bow to stern (skid plate) or only specifically under 40-50 cm of the bow and stern, which are particularly exposed to abrasion from ground contact.
If you glue the aluminum slates so tightly to the underwater vessel that they can withstand a sideways surf on the beach, there is nothing wrong with such keel protection.
How to Put Fenders on Your Kayak
It’s best to do this from the very beginning to avoid any initial damage. However, if you have a used and somewhat worn kayak, there’s a plus side. You will be able to see traces of impact on the keel, and that’s a helpful guide on where exactly to place the bumper. Moreover, the roughened surface will offer better adhesion.
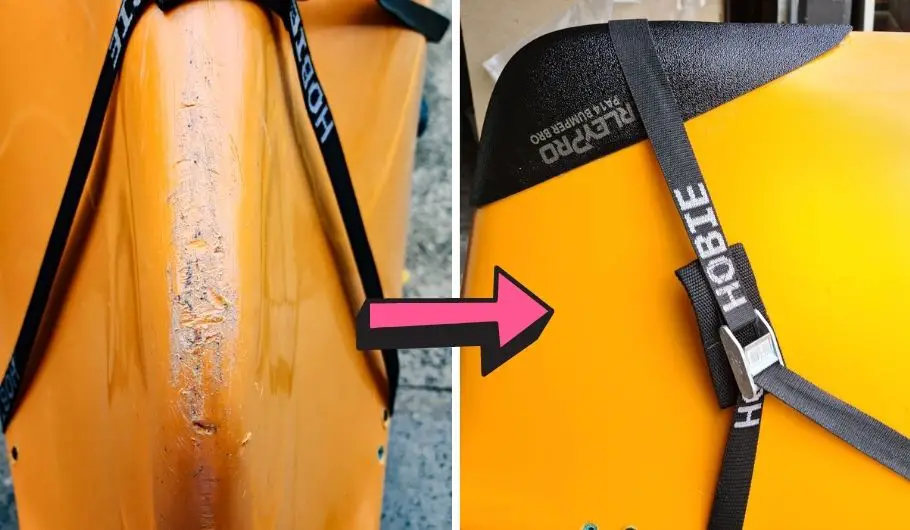
1. Hard-Plastic Kayak Bumper
Once you have purchased a suitable kayak bumper (e.g., Bumper Bro), turn your kayak over so you can work and follow these steps:
- Smoothen out any large plastic parts with sandpaper;
- Clean the surface where you’ll attach the bumper with rubbing alcohol and let dry;
- Clean the inside of the kayak bumper with rubbing alcohol;
- Apply a generous amount of appropriate adhesive to the kayak and to the inside of the bumper;
- Press the bumper firmly against the nose of the kayak; wipe up any glue excess;
- Try to achieve a flush seal of the bumper with a line of adhesive around the lip of the bumper;
- Lastly, allow to set for 48 hours before taking it out on the water.
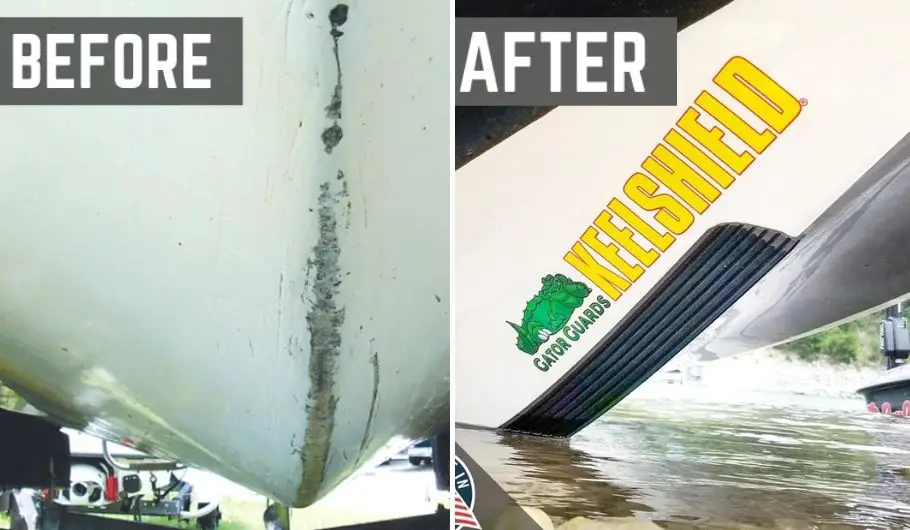
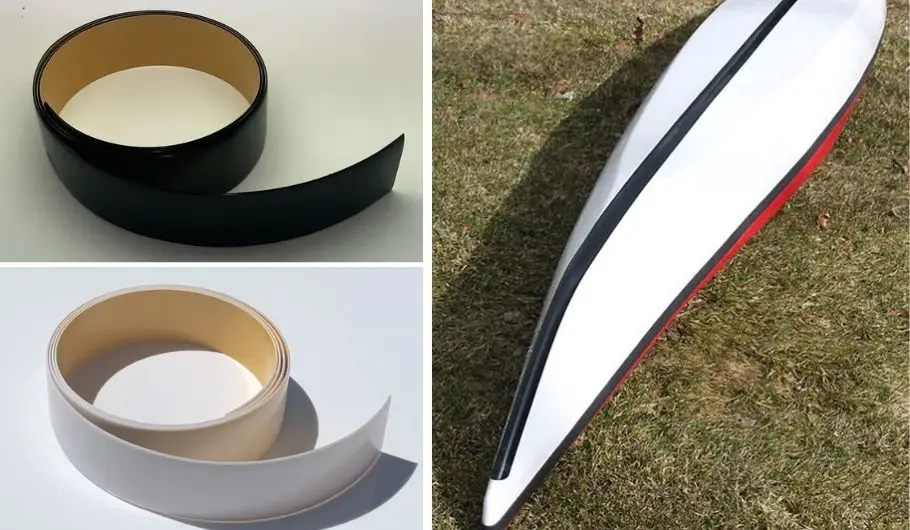
2. Flexible Kayak Keel Guard Patch
In addition, you can also use a longer flexible patch to equip your kayak with bumpers, like the Gator Patch.
Protective patches are often a mix of polyester resin and fiberglass, and they have UV activation, which means that they will harden in direct sunlight.
Turn the kayak over and proceed as follows:
- Clean the surface of the kayak with water and rubbing alcohol;
- Take the protective strip out of the package and cut it to size (ideally, it should go all the way to the kayak skid plate);
- Roughen the surface so that the glue has something to adhere to;
- Round the edges of the patch so that it fits seamlessly to the rounded surface of the kayak;
- Press firmly to push out any air bubbles;
- The patch will cure in direct sunlight and become hard enough to smooth with sandpaper;
- Wipe with a damp cloth, let dry;
- Spray paint in the color of your choice.
You can use a combination of the first and the second method — for example, by applying a protective patch to the hull to serve as a skid plate and mounting a hard-shell bumper to the keel.
Read our article on how to use Kevlar felt to repair sun damage to your kayak.
Final Thoughts
To prevent wear on the keel from landing on rocky beaches and best protect your investment, you should always consider equipping your kayak with bumpers.
On the other hand, you don’t want to compromise your kayak’s ability to glide through the water without additional drag.
A kayak bumper should have an appropriate size relative to your kayak dimensions, and you should apply it seamlessly. Thus, you will also avoid the bumper falling off due to the resistance force of water or weakened adhesive.
Looking to learn more about kayaking? Read our entire kayak series to become a pro.